

Showing Google Ads on a WordPress site is mostly a policy exercise, not a coding one. The signup takes ten minutes. Getting approved, keeping the account, and not wrecking your page speed in the process is the part that takes real work. This guide covers the route Google itself now recommends, the ads.txt file most tutorials still skip, and the ad density that quietly costs you rankings.
Quick verdict
- Start here: Site Kit by Google, which injects the AdSense snippet site-wide without you touching a theme file.
- Best free setup: Site Kit for the code, a hand-written ads.txt file, Auto ads switched on in AdSense with anchor and vignette formats turned off.
- Skip AdSense if: your traffic is small and your topic has affiliate or product demand. Impression income scales with volume, so at low traffic one good affiliate placement usually out-earns a page of banners.
- Our call: start with Site Kit and Auto ads to get approved and earning, then move to a dedicated ad plugin once you want manual control over where units land.
What changed, and why older tutorials get you rejected
Most AdSense walkthroughs still describe an interface that no longer exists. They send you to Appearance > Editor to paste code into a theme header, or to a My Ads > Content menu that AdSense retired years ago. Follow either and you will either edit a file that a theme update overwrites, or hunt for a screen that is not there.
Three things genuinely moved. Google now points WordPress publishers at Site Kit rather than manual code in its own AdSense and WordPress documentation. Site ownership can be confirmed three ways instead of one. And ads.txt went from an obscure ad tech detail to something AdSense nags you about in the dashboard.
Before you apply: what AdSense actually requires
The published eligibility requirements are shorter than the internet suggests. You need content that is your own and follows the program policies, you have to be 18 or over, and you need access to the HTML source of the site you submit. That is the list.
Notice what is absent. There is no stated post count, no traffic floor, no word count and no six-month domain age rule, whatever the approval blogs tell you. What gets sites turned down is content Google reads as low value, and a site that looks unfinished. A practical pre-flight check:
- Fifteen to twenty real articles that answer a question, not 800-word filler spun around a keyword.
- About, Contact and Privacy Policy pages that exist and say something. The privacy page has to disclose that third-party vendors serve ads and use cookies, which is also where your GDPR consent setup comes in if you get EU traffic.
- Navigation that works everywhere. No dead menu items, no half-built category archives, no placeholder posts.
- No copyrighted material you do not own, and no traffic bought from paid-to-click schemes or bulk email.
If the site is brand new, spend the month on content instead of on the application. A rejection is not fatal, but reapplying with an unchanged site wastes weeks. Our guide to starting a blog the right way covers the groundwork that also happens to be what AdSense reviewers look for.
How to show Google Ads on your WordPress site
Six steps, in order. Steps one to three get you approved and serving; four to six are the ones that separate a working setup from a broken one.
Step 1: Create the AdSense account
Sign in at adsense.google.com with the Google account you want the earnings attached to. You need three things: the account itself, a phone number and postal address matching the bank account that will receive payment, and the site URL you are submitting.
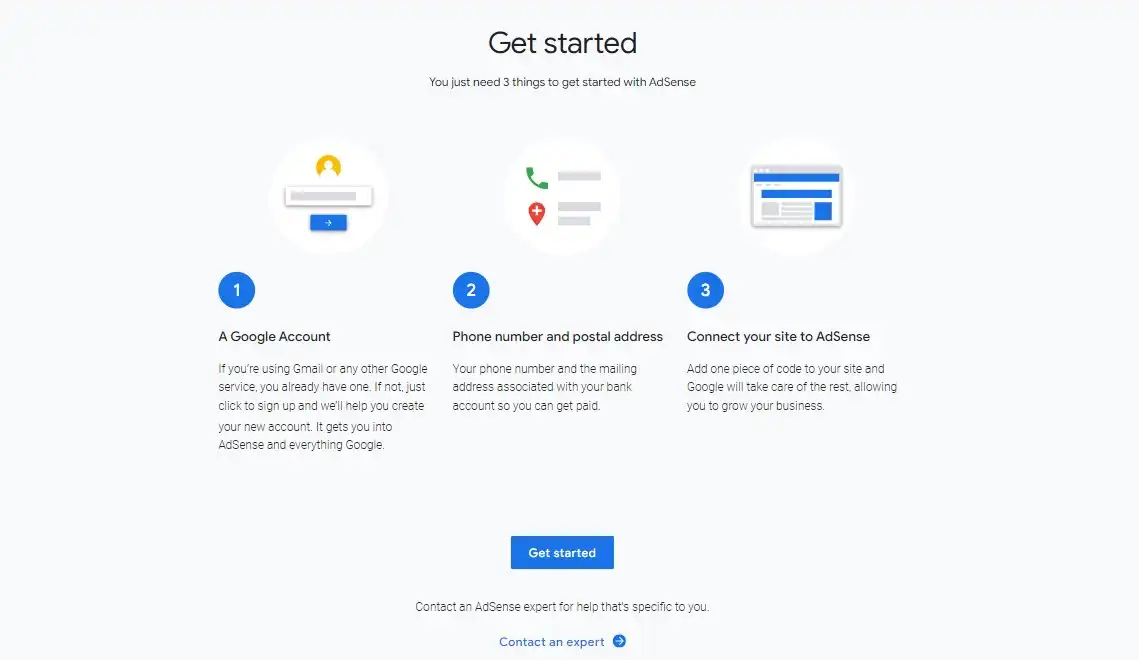
Use the postal address exactly as your bank holds it. Google mails a PIN to that address later, and a mismatch there is a common reason a first payment stalls for months.
Step 2: Connect the site with Site Kit
This replaces every instruction about pasting code into header.php. Site Kit by Google sits at over five million active installations and is the route Google now points WordPress publishers to. Install it from Plugins > Add New, activate it, run Start Setup, then open Site Kit > Settings and connect the AdSense service.
When it offers to place the AdSense code, say yes. Site Kit writes the snippet into your head on every page, survives theme updates, and can be removed cleanly later. If you would rather keep the snippet under your own control, a code snippet plugin such as WPCode does the same job with a header field you own.
AdSense will verify ownership through one of three routes: the ad code itself, your ads.txt file, or a meta tag. The meta tag exists for publishers who do not want ad code on the homepage during review. Whichever you pick, the site only serves ads once it reaches Ready status in the AdSense Sites list.
Step 3: Publish your ads.txt file
Google’s ads.txt guide describes the file as highly recommended rather than mandatory. In practice it is required, because AdSense raises a warning on your account without it and buyers discount inventory that nobody has authorised. Create a plain text file at the document root, so it answers at yourdomain.com/ads.txt, containing one line:
google.com, pub-0000000000000000, DIRECT, f08c47fec0942fa0Swap in your own publisher ID. Site Kit does not generate this file, which surprises people. Either upload it over SFTP, or let an ad plugin write it, which Advanced Ads does automatically. Formatting matters: the file has to match the IAB Tech Lab spec or AdSense reports it as unauthorised rather than found. Changes can take a few days to register, and the AdSense Sites screen has a Check for updates button that forces a recrawl.
Step 4: Turn on Auto ads, then immediately restrain them
Site Kit places the code but does not enable anything. Go to Ads > By site in AdSense, switch Auto ads on for your domain, and then spend two minutes in the settings that most publishers ignore. Turn off vignettes, which are the full-screen interstitials between page loads. Decide deliberately about anchor ads. Pull the ad load slider well down from its default.
Ad intents, the format that turns words in your own copy into ad links, is an opt-in setting on the same screen. Leave it off until you have a revenue baseline to compare it against, because it changes how your body copy reads and readers do notice.
Step 5: Verify it actually works
Do not trust the dashboard. Check the page itself:
- Open your site in a private window, logged out, with any ad blocker disabled. Blockers make your own ads invisible to you and nobody else.
- View source and search for
adsbygoogle. The script should appear once in the head. Twice means Site Kit and a second plugin are both injecting it, which triggers policy warnings. - Load yourdomain.com/ads.txt directly. You should see plain text with your publisher ID, not a 404 and not your theme’s styled error page.
- Open the browser console and look for blocked requests to googlesyndication.com. If they are blocked, a security or optimization plugin is the culprit.
- Wait. Fresh accounts often show blank space for hours or days before fill begins. Blank slots are normal early on and are not a sign you did anything wrong.
The AdSense Sites list is the source of truth for whether you are actually approved. Anything other than Ready means no ads will serve, regardless of what your page source contains.
Step 6: Verify your address and set up payment
Once earnings cross a verification amount, Google mails a PIN on a card to the address on the account. Enter it in AdSense to unlock payouts. Separately, add your bank details and complete tax information. Payment is released when the balance clears the published payment threshold, which is 100 US dollars, or the local equivalent such as 70 euros or 60 pounds.
Which insertion route should you use
Site Kit plus Auto ads is the right default. You outgrow it the moment you want a specific unit in a specific place, at which point one of the dedicated ad plugins earns its keep.
| Route | Cost | Placement control | Writes ads.txt | Best for |
|---|---|---|---|---|
| Site Kit by Google | Free | Low, Auto ads decides | No | Getting approved and serving with the least fuss |
| WPCode | Free core, paid tiers available | Medium, you choose the hook or shortcode | No | Hand-placing two or three units and nothing more |
| Advanced Ads | Free core; Pro from EUR 59 per year, first-year price | High | Yes | Several units with rotation, scheduling and targeting |
| Ad Inserter | Free core, Pro version available | High | No | Paragraph-level and CSS-selector placement rules |
Every route above has a free tier that covers plain AdSense, so cost is not the deciding factor. Control is. Advanced Ads generates ads.txt for you, and it pulls your ad units straight from your AdSense account; its pricing page lists Pro from 59 euros a year as a first-year figure. Ad Inserter is stronger if you want rules like “after the third paragraph, but only on posts over 1,200 words”. WPCode is not an ad plugin at all, it is a snippet manager, which is exactly enough if you only ever place two units.
Running two of these at once is the classic self-inflicted wound. Pick one, and disable Site Kit’s code placement if the ad plugin is inserting the snippet itself.
The catch: ad density is a Core Web Vitals problem
This is the part roundups leave out because it is inconvenient. Google’s guidance on layout shift names ads as one of the largest contributors to shifting on the web, and Auto ads make that worse by design, because slots are injected after the page has already painted. Content jumps, a reader taps the wrong thing, and your Core Web Vitals suffer: the targets are 2.5 seconds for Largest Contentful Paint, 200 milliseconds for Interaction to Next Paint and 0.1 for Cumulative Layout Shift, measured at the 75th percentile of real page loads.
The fix is unglamorous: reserve the space before the ad arrives, using a min-height or an aspect-ratio on the container, and remember that content injected near the top of the viewport shifts more than the same content injected further down. An above-the-fold slot with no reserved height manages both mistakes at once.
Practical rules that survive contact with a real site:
- Reserve a fixed height for every slot, sized to the ad you most often get, and accept the occasional gap. A little whitespace beats a shift.
- Keep the first ad below the first screenful on mobile. Because shifts near the top of the viewport cost more, that one placement decision does more for your layout shift scores than CSS tuning afterwards.
- Never route ad containers through your lazy loading plugin. Image lazy loaders and ad scripts fight, and the ad usually loses.
- Fix the page before you add scripts to it. Compressed images and a caching layer buy you the performance headroom the ad script is about to spend.
- Measure with field data from Search Console, not a one-off lab run. Ad fill varies per load, so a single test tells you very little.
If your scores were already marginal, do the speed work first. WP Rocket for caching and Perfmatters for trimming what loads on each page are the two we reach for most often on client builds, and both leave you room to absorb the ad script afterwards.
What most AdSense guides get wrong
The six-month rule. It gets repeated everywhere and it is not in Google’s published requirements. Content quality is the gate, not the age of the domain.
The revenue share. Publishers keep 80 percent of revenue after the advertiser platform takes its fee, per Google’s revenue share documentation. Where Google Ads is the buyer, the effective figure lands near 68 percent. Both numbers are true; guides quoting only one of them are describing half the picture.
Ad limits. Guides still quoting a three-units-per-page cap are quoting a rule that is not in the policies. Density is a judgement call now: the Google Publisher Policies disallow screens carrying more ads or paid promotion than publisher content. There is no number to hide behind, and Google can throttle serving on pages it reads as low value or overloaded.
Editing theme files. Any guide still telling you to paste code into your theme header was written for a WordPress that has moved on. Block themes do not expose that editor in the same place, and a theme update wipes the change regardless. Use Site Kit, a snippet plugin or a child theme.
Decision path
- New site, no approval yet: build content first, then Site Kit, then Auto ads on a low ad load. Do not buy an ad plugin you cannot use yet.
- Approved and earning, want more control: add Advanced Ads or Ad Inserter, turn Site Kit’s snippet placement off, and place units by hand.
- Traffic is small but commercially valuable: AdSense is the wrong lever. Look at the other ways to monetize a WordPress blog before you paper your pages with banners.
- Already slow: fix performance first. Hanging ad scripts on a page that already fails Core Web Vitals compounds a problem you have not solved yet.
Frequently Asked Questions
Do I need a minimum number of posts or months online before AdSense approves my site?
Google publishes no post count, no traffic minimum and no domain age rule. The stated requirements are original content that follows the program policies, an applicant aged 18 or over, and access to the site HTML. Thin or copied pages are what actually triggers a rejection.
Is ads.txt required for AdSense?
Google calls ads.txt highly recommended rather than mandatory, but AdSense flags your site when the file is missing and buyers discount inventory nobody has declared. Treat it as required. A single line at yourdomain.com/ads.txt naming your publisher ID is enough for AdSense.
Does Site Kit place the AdSense code for me?
Yes. Connecting AdSense inside Site Kit injects the AdSense snippet site-wide, so you never edit a theme file. It does not create your ads.txt file and it does not switch Auto ads on. Both of those stay manual, and both are done inside AdSense.
How much of the revenue does a publisher keep?
For AdSense for content you keep 80 percent of the revenue after the advertiser platform takes its fee. Where Google Ads is the buyer, the effective share lands near 68 percent. What you actually earn depends on niche, country and viewability far more than on that split.
When does AdSense actually pay out?
Payment is issued once your balance clears the threshold, which is 100 US dollars or the local equivalent, such as 70 euros or 60 pounds. You also have to verify your mailing address with the PIN Google posts to you before any money can leave the account.
Will Auto ads damage my Core Web Vitals?
They can. Auto ads insert slots after the page has painted, which shoves content downward and inflates Cumulative Layout Shift. Reserve height for every slot, keep ad units out of the top of the viewport, and judge the result on field data rather than a lab score.
Can I run AdSense alongside a caching or optimization plugin?
Yes, and you should. Cache the HTML as normal, but leave the AdSense script out of minification and deferral, and never lazy load ad containers with a generic image lazy loader. Both of those routinely stop ads rendering and quietly cost you impressions.
How many ads am I allowed per page?
There is no numeric cap any more. The publisher policies forbid screens carrying more ads or paid promotion than publisher content, so the real limit is a ratio you judge yourself. Google can also throttle serving on pages it reads as low value or overloaded.
Why was my AdSense application rejected?
The usual causes are low value content, missing About, Contact and Privacy pages, navigation that dead ends, and a site that is visibly half built. Fix the content, then reapply. Sending the same site back in unchanged does not improve your odds on the second pass.
Conclusion
Use Site Kit. It is free, Google recommends it, it survives theme updates, and it removes the only genuinely fragile step in the old process. Add ads.txt by hand the same afternoon, switch Auto ads on with vignettes off and the ad load turned down, and check the page in a logged-out window before you believe anything the dashboard tells you.
Then be honest about the maths. AdSense pays per impression, so it rewards volume, and a site with modest traffic will usually earn more from one well-placed affiliate link, or a product of its own, than from a page full of banners. Keep your ad density low enough that your SEO work keeps compounding, because search traffic is the asset. The ads are just rent you collect on it.



[…] The catch nobody mentions in the sign-up flow: ad scripts are the heaviest thing most blogs ever load. Layout shifts, delayed largest contentful paint, a mobile experience that jumps under the reader’s thumb. Budget time to speed optimize your WordPress site after the ads go live, not before. For the mechanics of getting the code onto the page, we have a step-by-step on showing Google Ads on a WordPress site. […]