


An ACF tutorial worth following does one job: turn messy “extra data” into named fields editors can fill, then show those values on the front end without breaking the design.
Native WordPress custom fields still exist, but they are untyped and easy for clients to misuse. Advanced Custom Fields (ACF) Free ships as version 6.8.11 with 2+ million installs on WordPress.org (checked November 2026).
Below: install Free, build a field group, fill a post, then display with get_field / the_field or Elementor Pro dynamic tags, plus verify and undo.
⚡ Quick answer
- Best for: freelancers and site owners who need structured fields (subtitle, price, hero image, CTA URL) without stuffing everything into the editor.
- Skip if: you only need the title and body once. ACF is overkill for a single static page with no repeating data pattern.
- Time needed: 30–60 minutes for a first field group plus theme or Elementor output; longer if you also register a custom post type.
- Our call: start on ACF Free. Add PRO when you need Repeater, Flexible Content, Gallery, Options Pages, or ACF Blocks. Store data in ACF; design the layout in your theme or Elementor.
Contents
- What is Advanced Custom Fields (and when do you need it)?
- What you need before you start
- How to add and display ACF fields (step by step)
- ACF field types cheat sheet (Free vs PRO)
- How to check your ACF setup worked
- What breaks and how to undo it
- Frequently Asked Questions
- Should you start with ACF Free or PRO?
What is Advanced Custom Fields (and when do you need it)?
Advanced Custom Fields is a WordPress plugin that adds structured content fields to edit screens, then loads those values in templates with a small API.
Per the official Getting Started guide, you install the plugin, create fields inside a field group, enter content on matching posts, and display values with get_field() and the_field().
Use ACF when the same facts appear on many posts (client name, product specs, team role) and editors need a form, not a free-for-all meta box.
Skip it when a normal title, featured image, and content block already cover the page.
Still choosing among meta plugins? Start with our Development pillar on custom field plugins for WordPress. This tutorial is the hands-on ACF path after that pick.
What you need before you start
- Administrator access and a recent backup of files + database.
- WordPress that meets ACF’s requirements (WordPress 6.2+ and PHP 7.4+, per the WordPress.org plugin listing checked November 2026).
- A child theme, or a maintained code snippet plugin, if you will print fields in PHP. Do not edit a parent theme you cannot update safely.
- Elementor Pro if you want Dynamic Tags → ACF Field (free Elementor alone does not ship those tags). Pair it with a single-post template; see how to create a single post layout with Elementor.
- A staging site or a throwaway draft post for the first experiment.
⚠️ Note on WordPress.org listings: Search may also show Secure Custom Fields, a community-maintained fork. This tutorial teaches Advanced Custom Fields (WP Engine) Free/PRO. Do not activate both.
How to add and display ACF fields (step by step)
Work top to bottom on a draft post. Stop and fix each verify line before stacking the next step.
1. Install Advanced Custom Fields
- Go to Plugins → Add New Plugin.
- Search for Advanced Custom Fields or ACF.
- Install and activate the listing by WP Engine.
- Confirm a new ACF item appears in the admin menu.
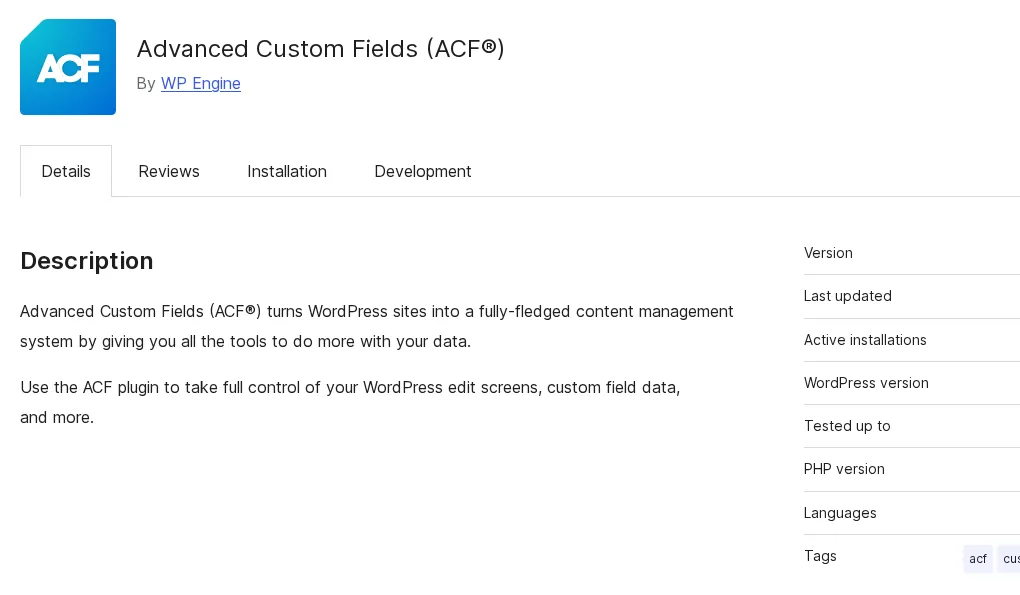
How to check: ACF → Field Groups loads. If the menu is missing, the plugin did not activate.
2. Create a field group and add fields
A field group holds the title, fields, location rules, and presentation settings. Follow ACF’s own Creating a Field Group doc for UI details.
- Open ACF → Field Groups → Add New.
- Title the group clearly, for example Case Study Details. Save stays disabled until the title exists.
- Click Add Field. Set a human Field Label (Client name) and a stable Field Name (
client_name): lowercase, no spaces. - Pick a Field Type (Text, Text Area, URL, Image, or Number are good first picks).
- Add Duration (Text) and Client website (URL) the same way, then drag the order handles.
Common mistake: renaming the Field Name after content is live. Labels can change; names are data keys. Renaming orphans old meta unless you migrate.
3. Set location rules
Location rules decide which edit screens show the group. Without them, fields appear everywhere or nowhere useful.
- Open the field group Location settings.
- Start narrow: Post Type is equal to Post, or Page equals one test page.
- Add and / or groups only when you need them.
- Leave Presentation defaults unless you need a sidebar position.
- Save. Confirm Active is on.
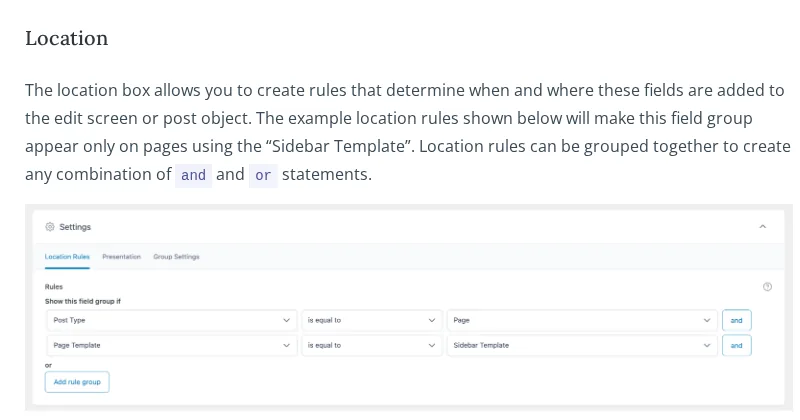
When you later attach fields to a custom post type, register the type first (ACF’s CPT UI, code, or a plugin from our custom post type plugins roundup), then point the rule at that type.
Do this if you are learning: lock the group to one draft so you do not litter every editor screen.
4. Edit a post and fill the fields
- Open a post that matches your location rule.
- Find the ACF metabox (title matches the field group).
- Fill each field. For Image fields, pick from the Media Library.
- Update / Publish, reopen, and confirm values persisted.
If the metabox is missing, the location rule does not match. Fix the rule before reinstalling anything.
5. Display fields with get_field and the_field
ACF saves values as post meta, but load them through ACF helpers so formatting matches the field type. See the get_field() reference.
get_field( 'field_name' ) returns a value you can test and escape. the_field( 'field_name' ) prints it (same as echoing get_field). Always escape on output; it is one of the cheapest wins in any WordPress security hardening checklist.
<?php
$value = get_field( 'client_name' );
if ( $value ) {
    echo esc_html( $value );
}
?>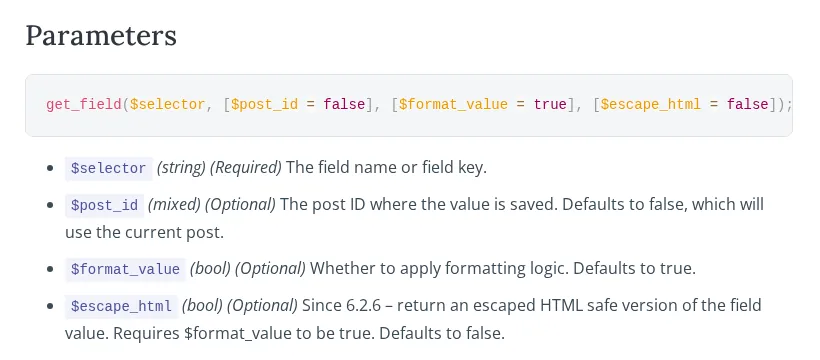
Put that inside the Loop in a child-theme template. Outside the Loop, pass the post ID: get_field( 'client_name', 123 ).
For URLs use esc_url. For Image fields returning an array, print $image['url'] and $image['alt'] with esc_url / esc_attr.
ACF also documents a shortcode: . Prefer templates for production layouts; treat the shortcode as a quick check.
💡 Tip: Since ACF 6.2.6, get_field( $name, false, true, true ) can return an HTML-escaped value when formatting is on. Still pick the right WordPress escaping function for the HTML context you print into.
The catch: empty fields still occupy layout space if you always print wrappers. Check the value first.
Or hide the Elementor widget when empty with how to hide a widget if an ACF field is empty and our dynamic visibility condition plugins roundup.
6. Display fields with Elementor dynamic tags
With Elementor Pro you often never open PHP. Elementor’s Help Center documents Dynamic Tags → ACF Field → Key (Elementor Integration With ACF). Pro is required for those tags.
- Create or edit a Single template under Templates → Theme Builder (or a draft page while learning).
- Add a Heading, Text Editor, Button, or Image widget.
- Click the dynamic tags icon on the control.
- Choose ACF Field, open its settings, and set Key to your field name (e.g.
client_name). - Optional Advanced: Before, After, and Fallback text when the field is empty.
- Set Display Conditions for the right post type, then preview a post that has data.
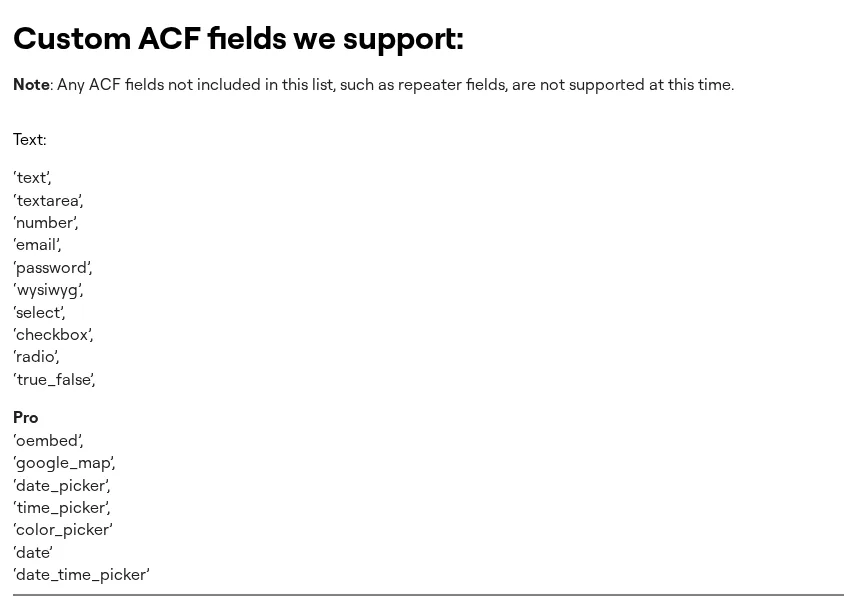
Elementor maps many ACF types to text, URL, and image tags. Repeater fields are not supported by the built-in ACF Field tag. For repeating rows you need PRO fields plus another display approach (custom loop, add-on, or PHP).
Dynamic tagging sits next to the rest of Elementor’s design system. Useful context if you are also tracking Elementor V4 atomic elements, classes and variables, or comparing builders in our Elementor review.
If a feature you need is missing from core Elementor, our list of Elementor addons for WordPress covers the add-ons that extend dynamic content.
Do this if non-developers own the layout. Skip if you already ship PHP templates and do not want a Pro dependency for field output alone.
ACF field types cheat sheet (Free vs PRO)
Start with Free types. Upgrade when the content model needs repeating rows or layout-like data structures.
| Need | Typical field | Usually in |
|---|---|---|
| Short label, phone, code | Text / Number / Email / URL | Free |
| Long plain text | Text Area | Free |
| Formatted copy | WYSIWYG | Free |
| On/off or choices | True/False, Select, Checkbox, Radio | Free |
| One image or file | Image / File | Free |
| Dates | Date Picker | Free |
| Link to other posts | Post Object / Relationship / Page Link | Free |
| Image set | Gallery | PRO |
| Repeatable rows | Repeater | PRO |
| Alternate layouts in one field | Flexible Content | PRO |
| Reuse field definitions | Clone | PRO |
| Site-wide options screen | Options Page | PRO |
| Custom Gutenberg blocks with fields | ACF Blocks | PRO |
How to check your ACF setup worked
- Admin: the field group is Active and lists the fields you expect.
- Edit screen: a matching post shows the metabox; values survive a reload.
- Front end (PHP): escaped values appear; empty fields print nothing (or your fallback).
- Front end (Elementor): preview uses a post with data; Key spelling matches the Field Name exactly.
- Wrong post type: a non-matching post should hide the fields when rules are tight.
What breaks and how to undo it
- Fields missing on edit screen: location rule mismatch, inactive group, or a second plugin defining the same ACF functions. Fix rules first; never run two ACF-compatible plugins together.
- Front end blank: wrong Field Name, code outside the Loop without a post ID, or a cached page. Purge page cache after template changes.
- Unescaped HTML surprises: you echoed
get_fieldraw. Wrap withesc_html,esc_url,esc_attr, orwp_kses_post. - Elementor shows nothing: not on Pro, wrong Key, unsupported type (e.g. Repeater), or empty preview meta. Set Fallback text while debugging.
- Parent theme update wiped PHP: restore from backup and move code to a child theme or snippet plugin.
- Need a full reset: deactivate ACF (meta usually remains), fix templates, then reactivate. Plan an export if you uninstall for good.
Frequently Asked Questions
What is an ACF tutorial supposed to teach first?
Install Advanced Custom Fields, create one field group with a few fields, attach it with a location rule, fill a test post, then display values with get_field or the_field, or Elementor Pro’s ACF Field dynamic tag. Saving data without a display step is only half the job.
How do I display ACF fields in WordPress?
In a theme template, call get_field( ‘field_name’ ) and escape the result, or use the_field( ‘field_name’ ) to print. Pass a post ID when you are outside the Loop. With Elementor Pro, bind a widget to the ACF Field dynamic tag and select the same field name as the Key.
What is the difference between get_field and the_field?
get_field returns the value so you can test, format, and escape it. the_field outputs the value immediately, equivalent to echoing get_field. Prefer get_field whenever you need an if-check or custom markup around the value.
Do I need ACF Pro for a beginner site?
Usually no. Free covers text, images, choices, relationships, and basic display. Buy PRO when you need Repeater or Flexible Content rows, the Gallery field, Options Pages, Clone, or ACF Blocks. Confirm current PRO pricing on the vendor site before upgrading.
How do I use ACF with Elementor?
Install ACF and Elementor Pro, create fields, then in the editor open Dynamic Tags on a widget, choose ACF Field, and set the Key. Use Before, After, and Fallback under Advanced. Repeaters are not supported by Elementor’s built-in ACF Field tag.
Why are my ACF fields not showing in the editor?
Almost always a location rule problem: the group is limited to another post type, page template, or specific post. Confirm the group is Active, then open a post that matches the rule exactly. Competing plugins that define the same ACF functions can also hide the UI.
Can I use the ACF shortcode instead of PHP?
Yes. ACF documents and an optional post_id attribute. It is fine for quick checks in content. For structured layouts, templates or Elementor dynamic tags are easier to maintain and style.
Is Secure Custom Fields the same as ACF?
Secure Custom Fields is a separate WordPress.org-maintained fork with a compatible-style API. Advanced Custom Fields Free/PRO remains the WP Engine product documented throughout this tutorial. Do not activate both; pick one stack and keep field names stable.
Should you start with ACF Free or PRO?
Start Free if you need a handful of scalar fields and will output them in a child theme, snippet, or Elementor Pro dynamic tags.
Upgrade to PRO if editors must add repeating rows, flexible layouts, galleries, or a global options screen, or you want ACF Blocks in Gutenberg.
Skip ACF entirely if every page is one-off marketing copy with no shared field model. A page builder alone is enough.
Next reading: the custom field plugins pillar for alternatives, then the Elementor single-post and empty-field guides linked above when you wire the front end.
Last updated November 2026.




[…] There is no custom-field condition on that list, and therefore no ACF condition. Elementor’s ACF integration is about printing a field through a dynamic tag, which is a different feature that also requires Elementor Pro. Printing a field and branching on whether it has a value are not the same thing, and conflating them is why people spend an afternoon in the wrong panel. For the printing side, see our guide to adding and displaying ACF fields. […]