

Learning how to create popups with Elementor takes about ten minutes. Getting the popup to actually appear is the part that eats an afternoon. Conditions, triggers and advanced rules live on three separate screens, all three have to agree before anything shows, and Elementor has moved Popup Builder out of its cheapest paid tier. This guide walks the current flow, names the exact settings, and tells you which plan you need before you pay for one.
Quick verdict
- Best overall: Elementor Pro’s own Popup Builder. Nothing else gives you the full editor, dynamic tags and form actions inside a popup with zero extra plugins.
- Cheapest plan that can do it: Advanced Solo, $84/year for one site. The Essential tier does not list Popup Builder.
- Best free: Popup Maker. Free on wordpress.org, roughly 700,000 active installs, and it covers exit intent, click triggers and cookie rules without a licence.
- Skip it if: you are on Elementor Pro Essential and popups are your only reason to upgrade. A $24/year gap buys you the feature, but a free plugin buys you the same outcome.
- Our call: already on Advanced Solo or higher? Use Popup Builder, it is genuinely good. On Essential or free Elementor? Install Popup Maker and keep the money.
Check your licence before you start
This is the step most tutorials skip, and it is the one that wastes the most time. Popup Builder is not in free Elementor, and it is no longer in every Pro plan either. Elementor’s own documentation states that Popup Builder and its display conditions, triggers and advanced rules are available in Elementor Pro on Advanced plans and higher.
The plugin pricing page backs that up: the Essential card lists Popup Builder as not included, while Advanced Solo, Advanced and Expert all list it as included.
| Elementor Pro plan | Sites | List price | Renewal | Popup Builder |
|---|---|---|---|---|
| Essential | 1 | $60/year | $60/year | Not included |
| Advanced Solo | 1 | $84/year | $84/year | Included |
| Advanced | 3 | $108/year | $108/year | Included |
| Expert | 25 | $204/year | $204/year | Included |
So the cheapest Elementor Pro plan that includes Popup Builder is Advanced Solo at $84 a year for one site. If you run several client sites, Advanced covers three for $108, which works out at $36 per site per year, and Expert covers 25 for $204, a shade over $8 per site. Freelancers with more than two live sites should do that arithmetic before defaulting to the single-site plan.
One more thing worth knowing before you commit: if the subscription lapses, Elementor says you can no longer update Elementor Pro or add Pro features, and you may only have limited access to existing Pro features. Free Elementor keeps working. Popups are a Pro feature, so treat the $84 as a recurring line item, not a one-off.
How to create popups with Elementor: the steps
Free Elementor sits at version 4.2.3 with more than 10 million active installs on wordpress.org, and it needs WordPress 6.8 and PHP 7.4 as a floor. Elementor Pro installs alongside it as a second plugin, not a replacement.
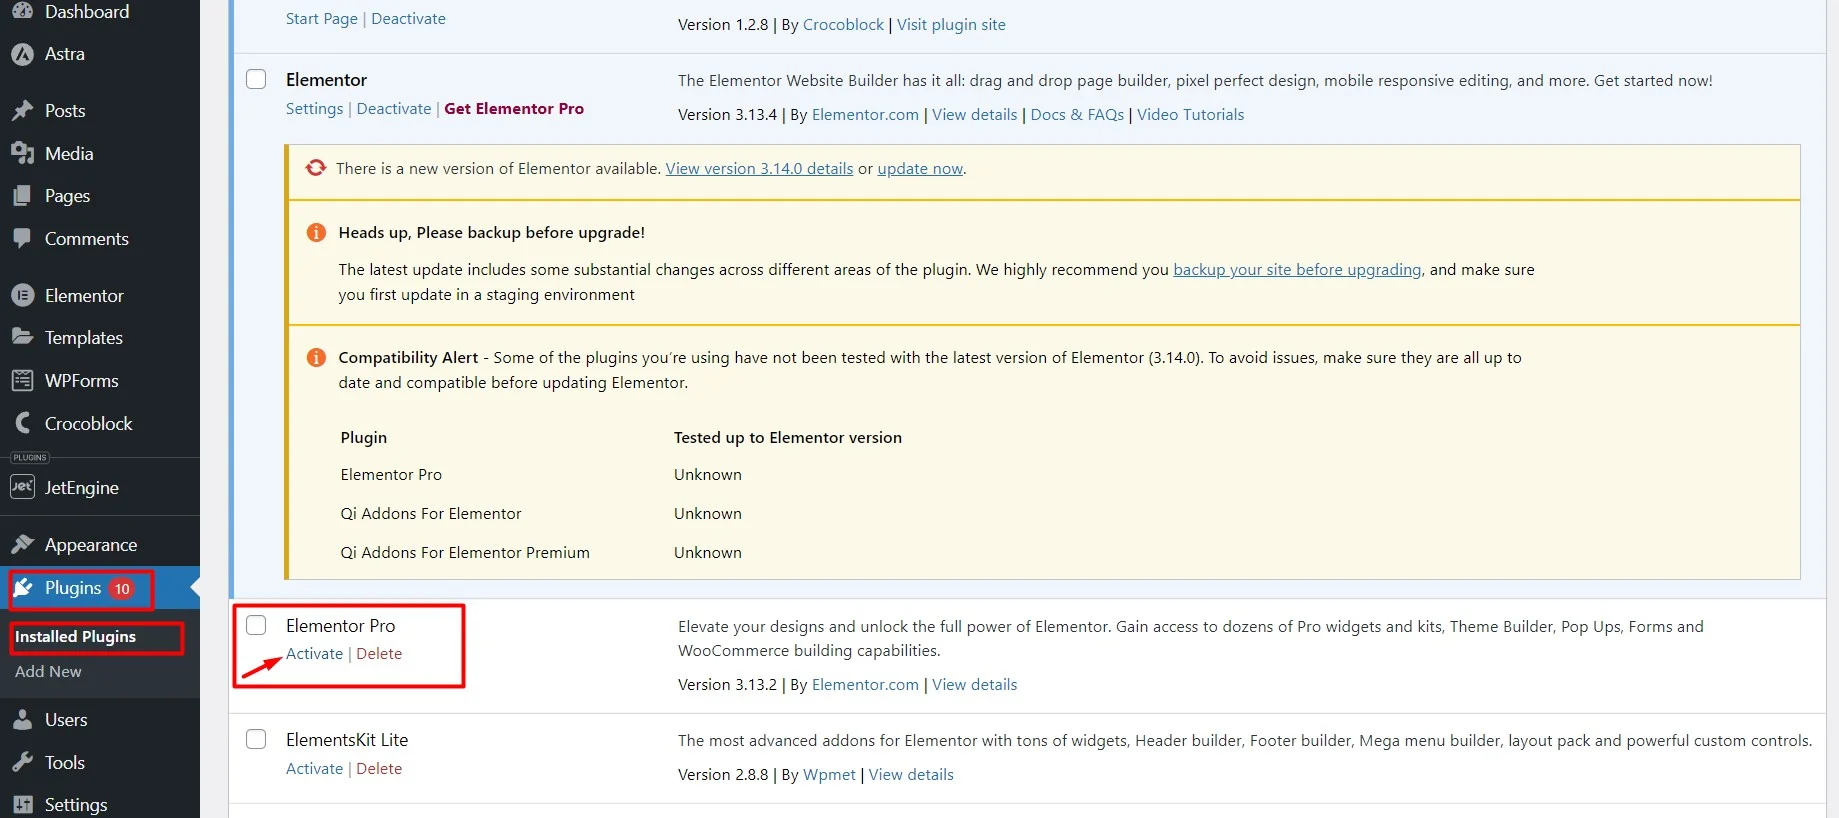
Step 1: install and activate Elementor Pro
Download the Pro zip from your Elementor account, upload it under Plugins > Add New, activate, then connect the licence. Both plugins need to be active. If only free Elementor is running, the Popups menu will not exist and you will spend twenty minutes looking for it.
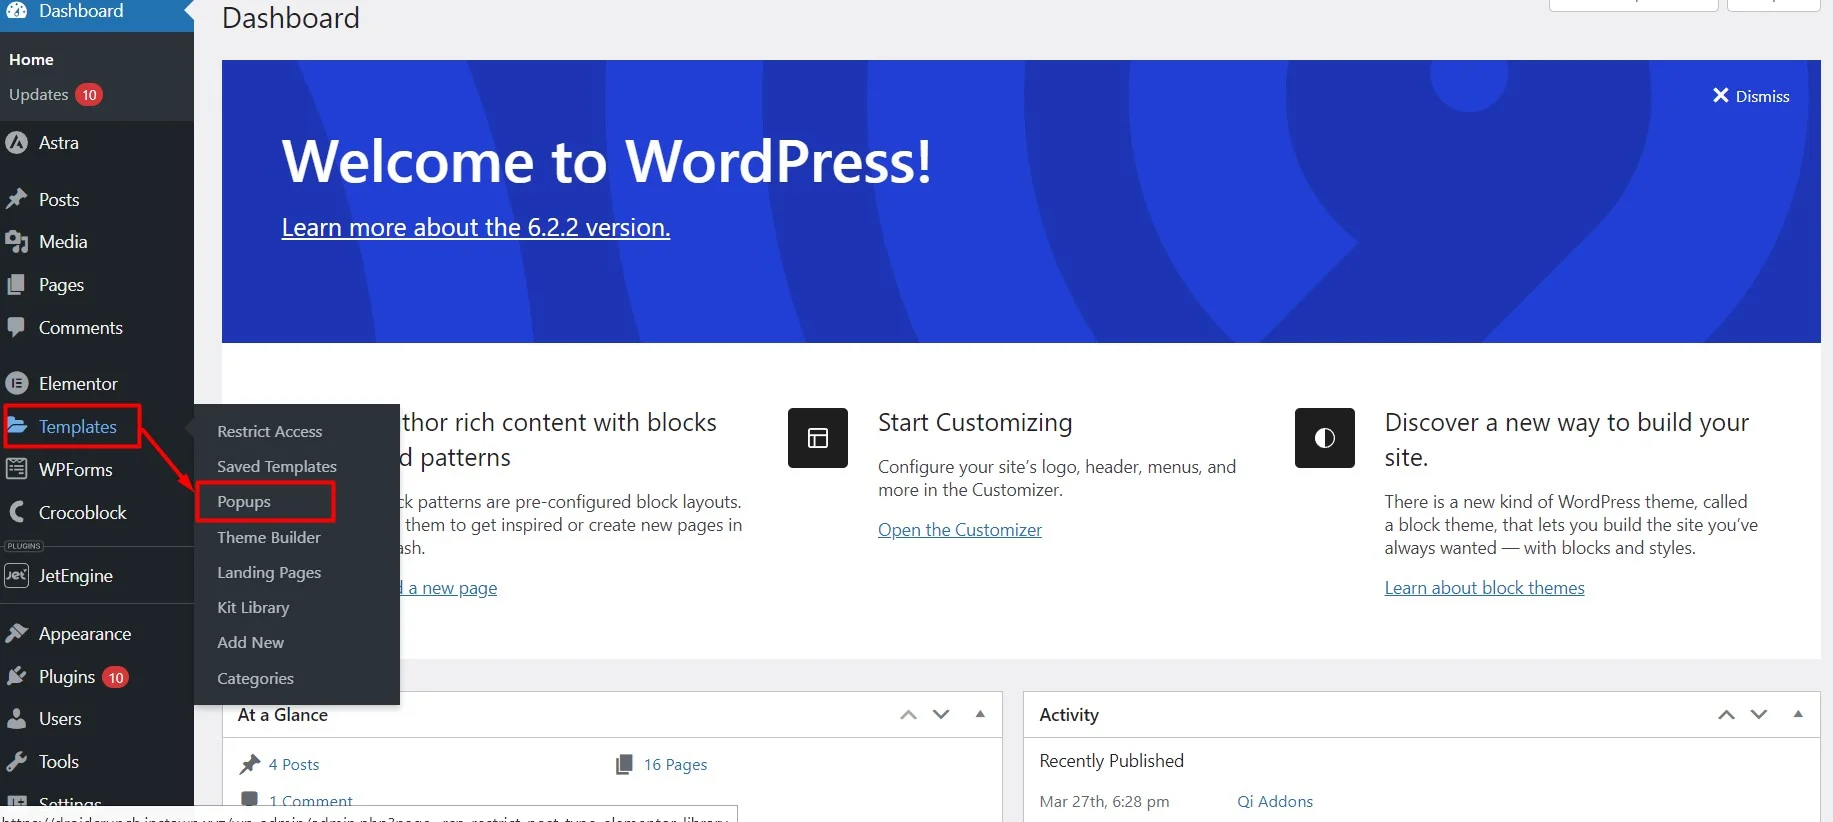
Step 2: open Templates > Popups
In the WordPress admin sidebar, hover Templates and choose Popups. Elementor’s documentation routes you the same way through Elementor > Templates > Popups. This screen lists every popup on the site, which is also where you go later to edit one.
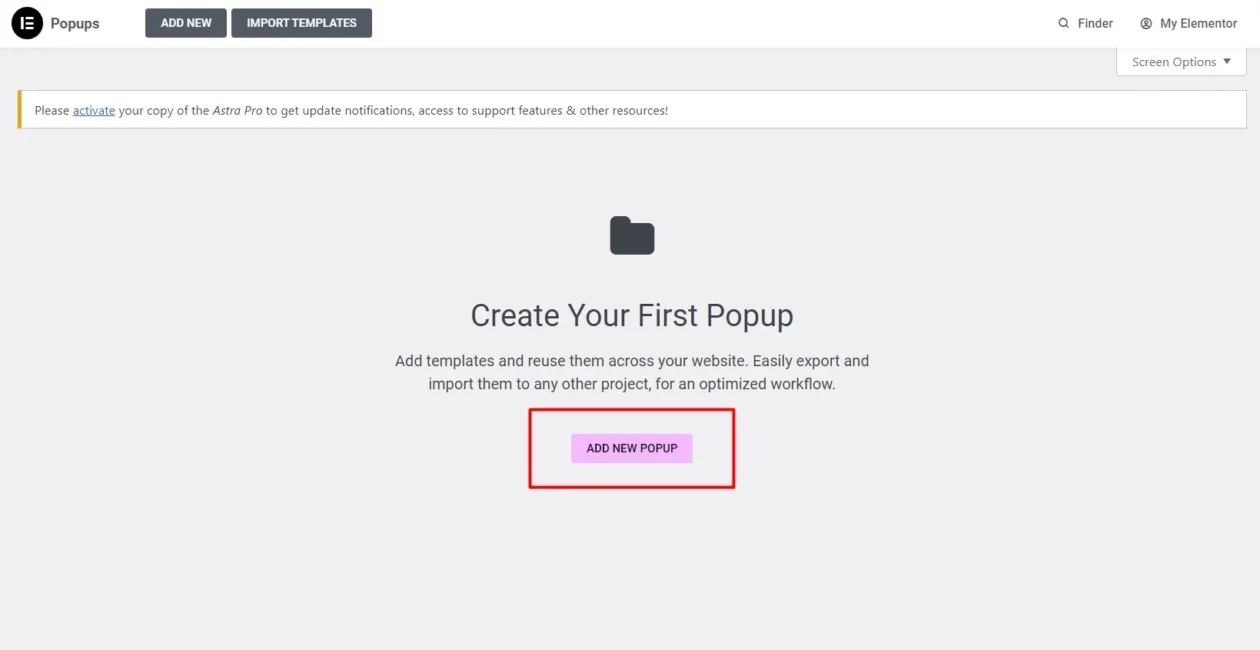
Step 3: add a new popup and name it
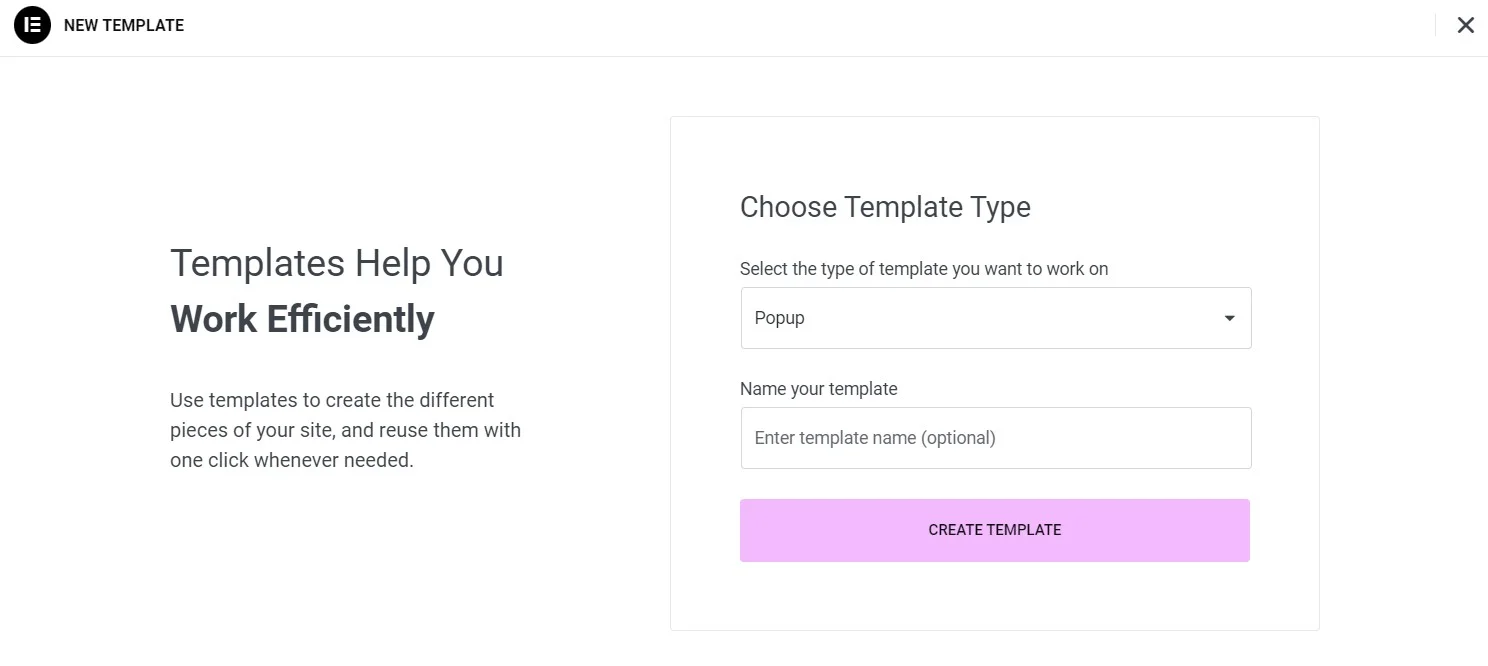
Click Add New Popup. Elementor asks for a template type, which is already set to Popup, and a name. Name it properly. Six months from now, “Popup 4” tells you nothing and you will open all of them to find the right one. Something like “Exit intent – pricing page – 10% off” pays for itself.
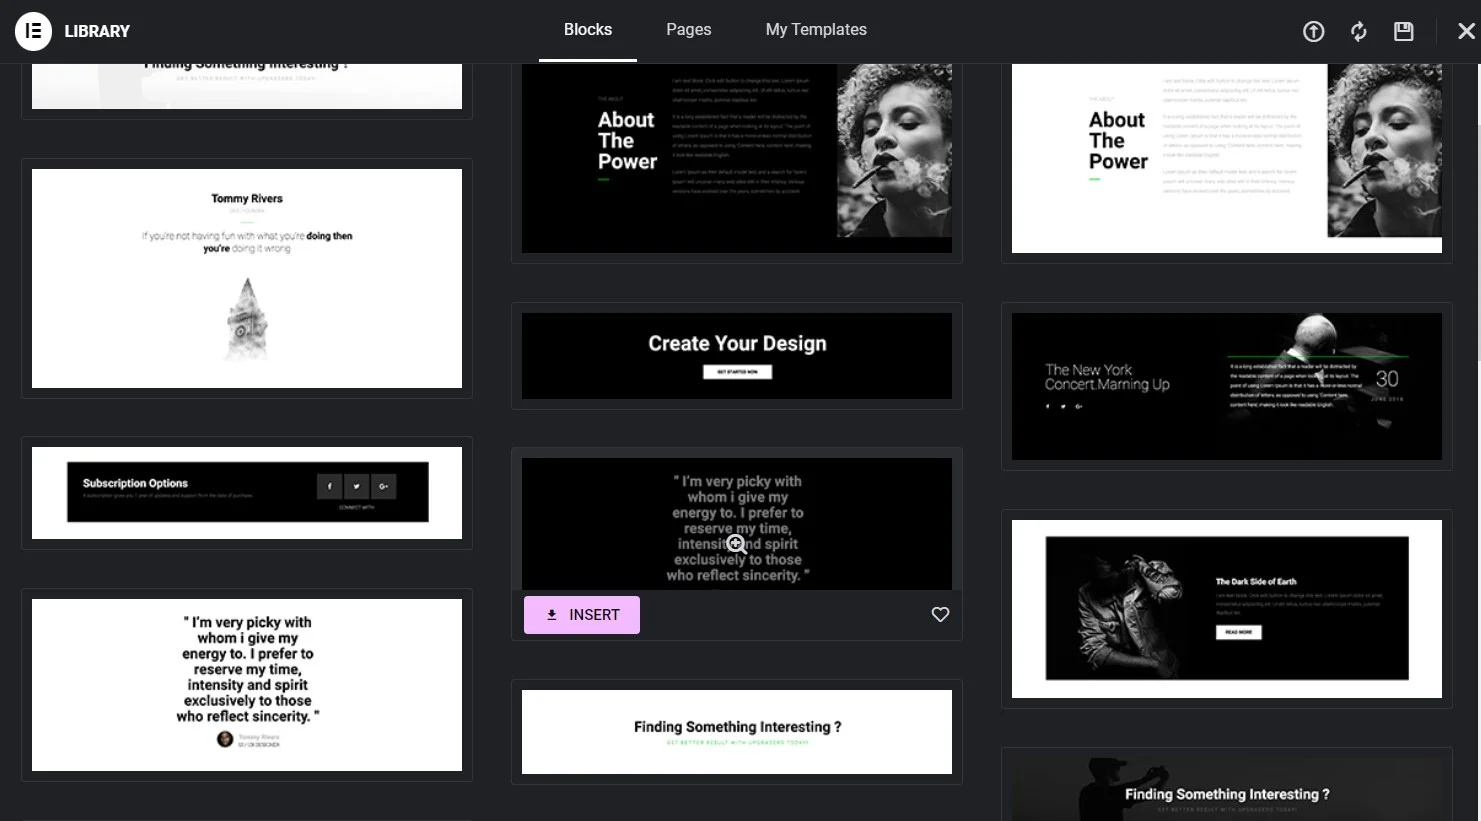
Step 4: pick a template or close the library
The template library opens automatically. Click Insert on a design you like, or close it with the X in the top right and build from an empty canvas. The stock popup blocks are fine as skeletons and universally wrong on brand, so most of the styling work happens afterwards either way.
Step 5: design it, then set the layout
Drag widgets in as you would on any page. The popup-specific controls live behind the gear icon at the bottom of the panel, under Popup Settings, and they are the ones worth learning:
- Layout: Width, Height, Horizontal and Vertical position, Overlay show or hide, Close Button show or hide, Entrance and Exit Animation, Animation Duration. Setting both Width and Height to 100vh gives you a full-screen popup; a bottom-anchored full-width one is a hello bar.
- Advanced: Show Close Button After (sec), Automatically Close After (ms), Prevent Closing on Overlay, Prevent Closing on ESC Key, Disable Page Scrolling, Avoid Multiple Popups, and Open By Selector.
A word on two of those. Prevent Closing on Overlay plus Prevent Closing on ESC Key plus a delayed close button is how you build a popup people genuinely hate, and Google has said since its intrusive interstitials announcement that content hidden behind a hard-to-dismiss overlay on mobile may not rank as well. Avoid Multiple Popups, by contrast, is the setting nobody turns on and everybody needs the moment they have a second popup live.
Step 6: set Conditions, which control where
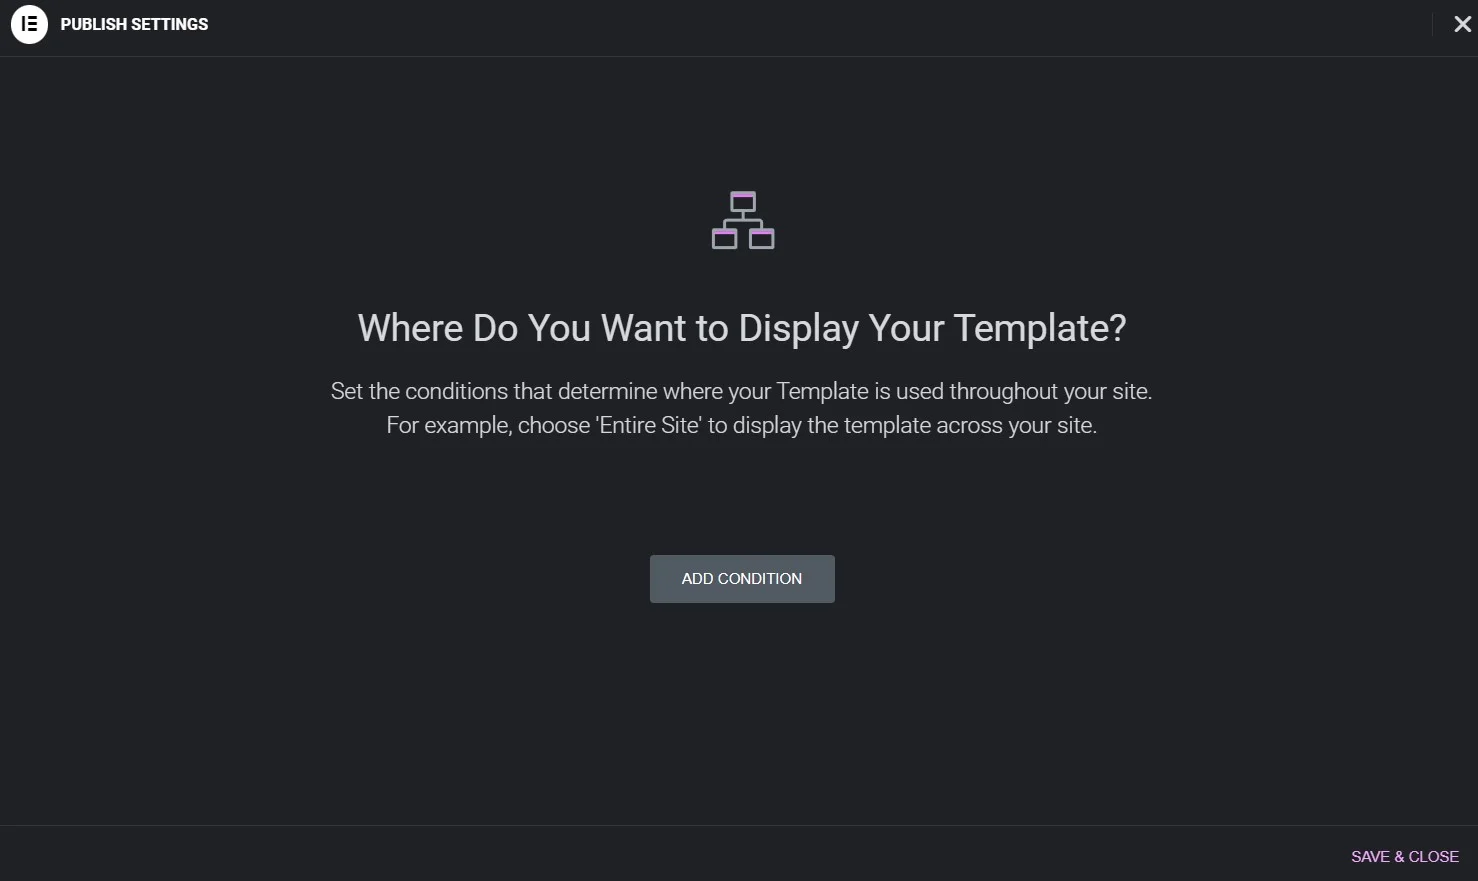
Hit Publish. Elementor opens the Publish Settings panel and asks where the template should display. Click Add Condition and pick from Entire Site, Singular or Archives, plus WooCommerce entries once that plugin is active. Each row is an Include or an Exclude, and you can stack several.
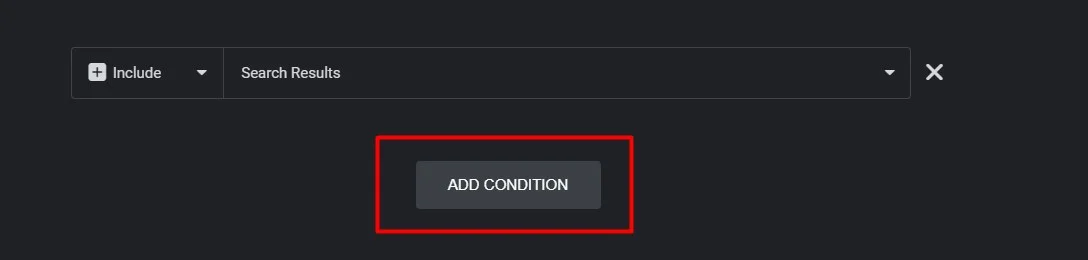
Include Entire Site then Exclude Singular > Pages > Checkout is the pattern most stores want. If the popup belongs on blog content only, Include Singular > Posts and leave everything else alone. The same conditions engine drives Elementor’s other templates, so if you have already built a single post layout in Elementor, this screen will look familiar.
Step 7: set Triggers, which control when
Click Next. Triggers are user actions, and each one is a simple Yes or No with a value:
- On Page Load: seconds to wait after load.
- On Scroll: pick Up or Down. Down is measured as a percentage of the page scrolled; Up is measured in pixels scrolled back. That asymmetry catches people out.
- On Scroll To Element: a CSS ID. You have to add that same ID to the target element’s Advanced tab, or nothing fires.
- On Click: the number of clicks anywhere on the page.
- After Inactivity: seconds of no interaction.
- On Page Exit Intent: fires on mouse movement that reads as leaving. Desktop behaviour; there is no mouse to track on a phone.
Step 8: set Advanced Rules, which control everything else
Click Next again. Advanced Rules are the non-user conditions, and this is where frequency capping lives:
- Show after X page views and Show after X sessions, a session running from the first visit until the browser closes.
- Show up to X times, counted either On Open or On Close. This is stored in the browser’s local storage and stays there until it is cleared, so your own testing browser will stop showing the popup long before your visitors’ do.
- When arriving from specific URL, with Show or Hide and an optional regex for pattern matching.
- Show when arriving from search engines, an external link or an internal link.
- Hide for logged in users, all users or selected roles.
- Show on devices, any combination of Desktop, Tablet and Mobile.
Then click Save & Close. The popup is live. Full option-by-option reference lives in Elementor’s Configure a popup documentation.
Step 9: verify it actually fires
Do not skip this, and do not test in the tab you have been working in. Open a private or incognito window, log out, and load a page that matches your Include condition. Perform the trigger. If it appears, clear that window and repeat once more to confirm your frequency cap behaves the way you expected.
Test on a real phone as well, not just the responsive preview. Exit intent will not fire there, and a popup sized comfortably on a 27-inch monitor can cover an entire small screen with no reachable close button.
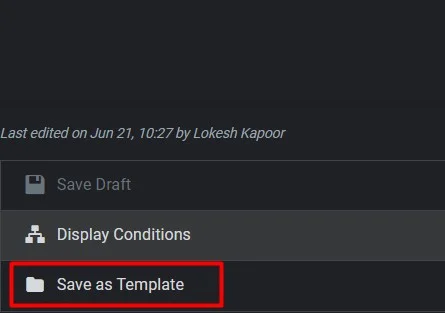
To reopen the settings later, edit the popup and click the arrow next to the Publish or Update button, then choose Display Conditions. That same menu holds Save as Template, which drops the design into your library for reuse on other builds, in much the same spirit as a global widget in Elementor.
Open a popup from a button or link
Automatic triggers are the noisy option. A popup that opens because someone clicked “Enrol now” converts better and annoys nobody, and it is a two-minute job.
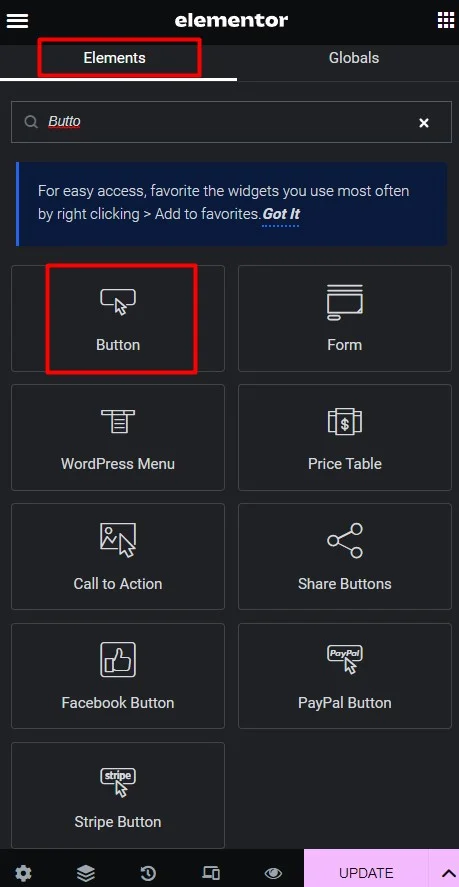
Drop a Button widget onto the page. Any of the button widgets for Elementor will do the same thing as long as the link field accepts a dynamic tag.
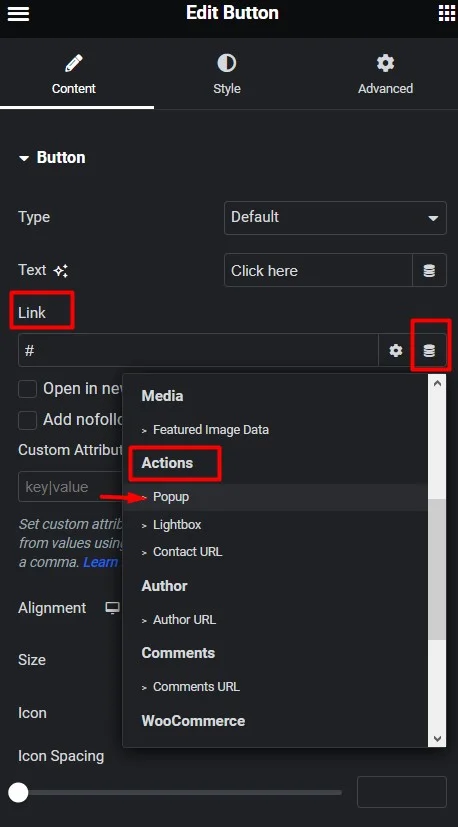
Click the dynamic tags icon at the right of the Link field, then choose Actions > Popup.
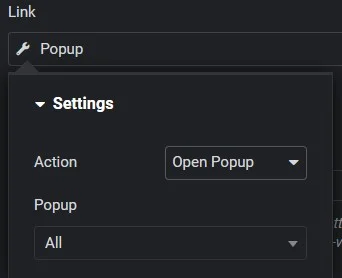
Open the wrench icon and set Action to Open Popup, then pick your popup from the list below it. Choosing Close Popup instead exposes a “Don’t Show Again” option, which is how you build a proper dismiss button inside the popup itself.
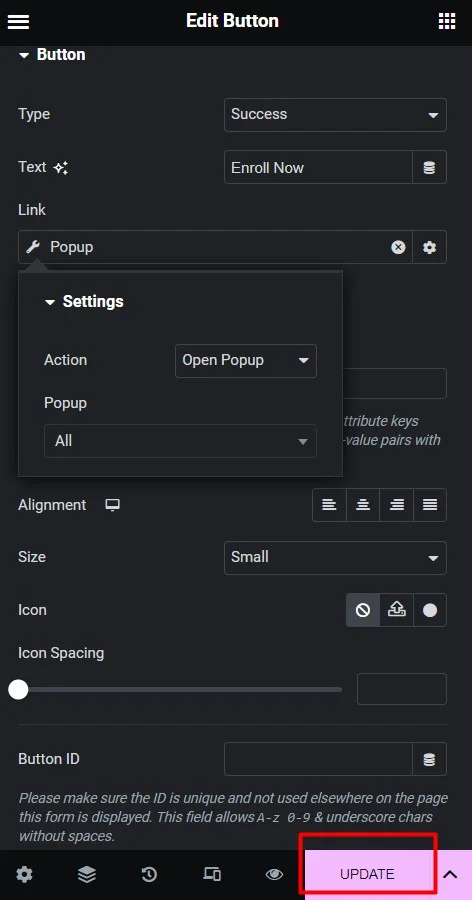
Click Update. Two variations worth knowing: an Elementor form can open or close a popup through Actions After Submit > Add Action, and any element at all, including a theme menu item or plain text, can trigger one. Give the element a class or ID under Advanced, paste it into Open By Selector in the popup’s own Advanced settings, and set a Condition that includes the page it sits on.
What breaks, and how to fix it
Almost every “my Elementor popup is not showing” ticket comes down to one of these.
- The three screens are an AND, not an OR. Conditions, triggers and advanced rules all have to pass at the same time. Set exit intent plus “arriving from search engines” plus “hide for logged in users” and you have built a popup that most of your traffic will never see. Elementor’s own troubleshooting article walks through exactly this scenario. Strip the rules back to one, confirm it fires, then add them back one at a time.
- Hide for logged in users misbehaves on cached sites. Elementor flags this in the same article: on a site with page caching, that rule may not work properly, because a cached page does not know who is asking for it. If you run WP Rocket or any of the other WordPress cache plugins, either exclude the affected pages from cache or handle the logged-in case with a Condition rather than an Advanced Rule.
- Custom selectors ignore your triggers. When a popup is opened by a custom selector, Elementor states plainly that Triggers and Advanced Rules are disregarded. Your carefully built “show up to 3 times” cap does nothing. Frequency capping on a click-opened popup has to come from Close Popup with “Don’t Show Again”.
- Local storage lies to you during testing. “Show up to X times” persists in the browser until the storage is cleared. Once you have hit the cap, the popup stops appearing for you and looks broken. Use a fresh private window each time.
- One page load, one popup. Elementor notes that a popup cannot display more than once unless the page is reloaded or re-entered. If you are testing a click trigger repeatedly, refresh between attempts.
- On Scroll To Element with no ID. The selector field expects a CSS ID that you also have to add to the element under its Advanced tab. Entering it in one place only is the single most common silent failure.
The catch nobody mentions
Three things get left out of most Elementor popup guides, and all three cost money or traffic.
There is no built-in analytics. Popup Builder will happily show a popup a hundred thousand times and tell you nothing about it. There is no impressions counter, no conversion rate, no A/B split. If you want to know whether the popup is working, you wire it up yourself with GA4 events or by counting form submissions on the other side. Plenty of older articles claim Elementor “provides analytics and insights” for popups. It does not, and building a campaign around a number you cannot see is a bad plan. If conversion measurement is the point of the exercise, read up on improving your conversion rate before you build the popup.
Every matching page loads the popup. Set a condition of Entire Site and the popup’s CSS and markup ship on every page, whether or not the trigger ever fires. It is not a large payload, but it is not free either, and stacking four site-wide popups is a genuinely daft thing to do to a site you have spent time optimising for speed. Scope conditions as narrowly as the campaign allows.
The plan tier moved. Popups used to be the headline reason to buy the entry-level Pro licence. On the current pricing page the Essential tier no longer lists Popup Builder, and the gap between Essential at $60 and Advanced Solo at $84 is $24 a year. That is not a lot of money, but it is a real change, and anyone renewing an old Essential licence on the assumption that popups are included is in for a surprise.
If Elementor’s popup builder is not the right tool
Three alternatives are worth naming. For the wider field, including the tools that do have proper analytics and split testing, see our roundup of the best WordPress popup plugins.
Popup Maker, the free route
Version 1.24.0, around 700,000 active installs on wordpress.org, and the free version covers click triggers, exit intent, cookie-based frequency rules and targeting. It is builder-agnostic, so it keeps working if you move off Elementor later. The paid Pro plan is currently discounted to $59.40 for the first year on a single site and then renews at $99 a year, which is more than Elementor’s Advanced Solo at $84, so it only makes sense if you want its analytics and want to stay off Pro.
JetPopup, if you already run Crocoblock
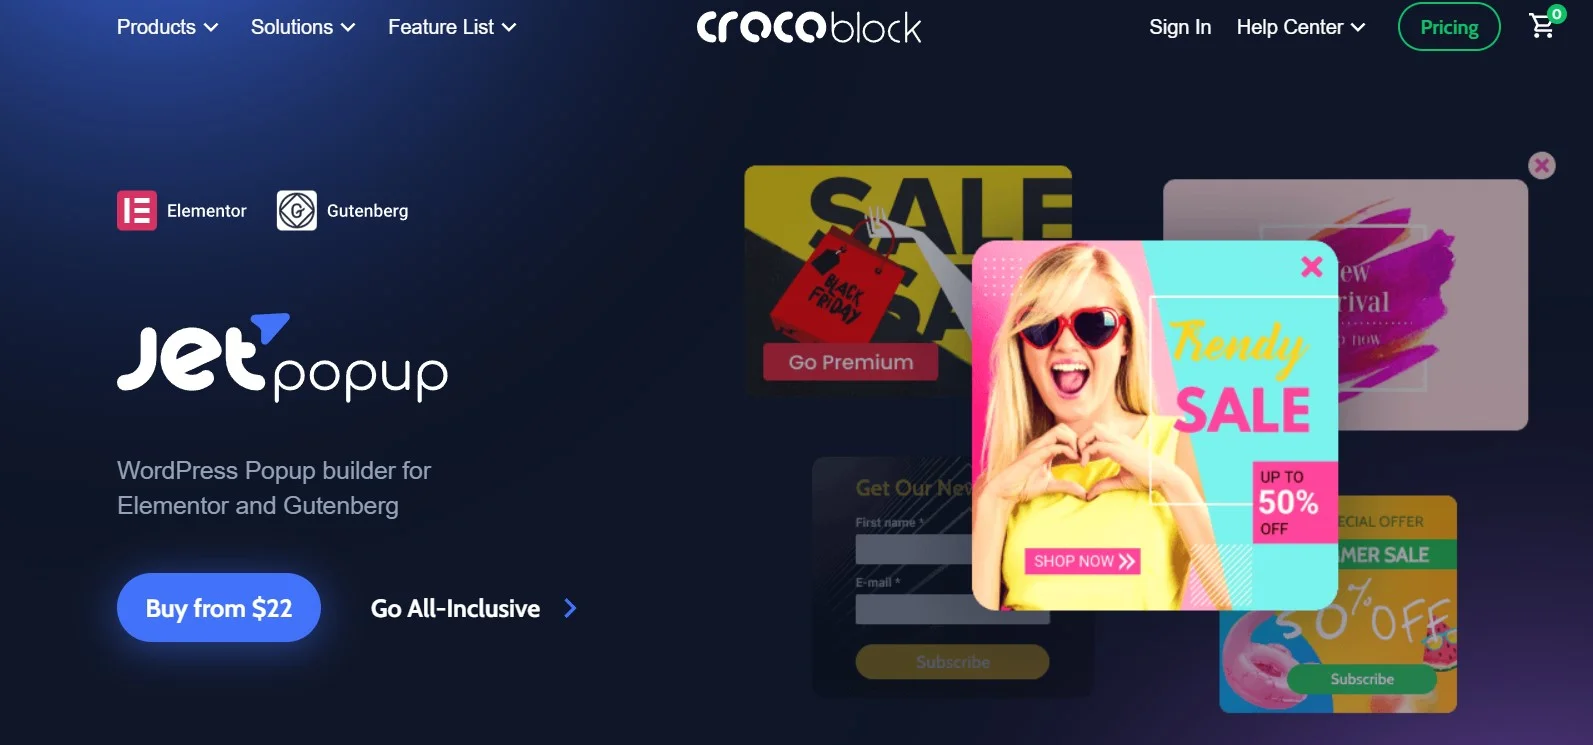
JetPopup builds popups with the Elementor editor and with Gutenberg, which is useful on hybrid sites. It is $43 a year for one site on its own, or bundled into Crocoblock‘s All-Inclusive subscription at $199 a year. Buying it standalone to avoid an Elementor Pro upgrade is false economy; buying it because you already own the bundle is sensible.
Popup widgets inside add-on packs
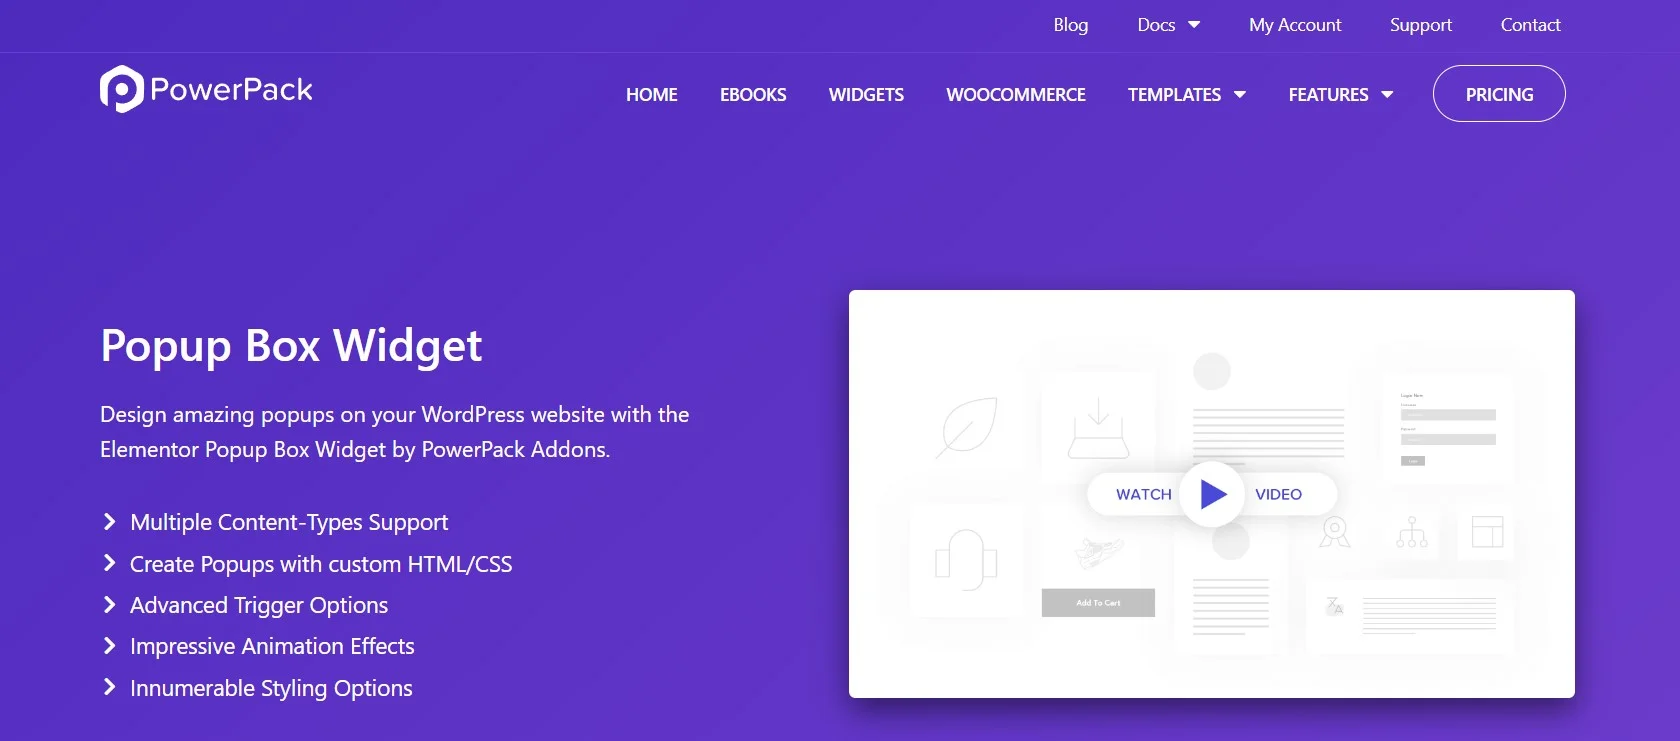
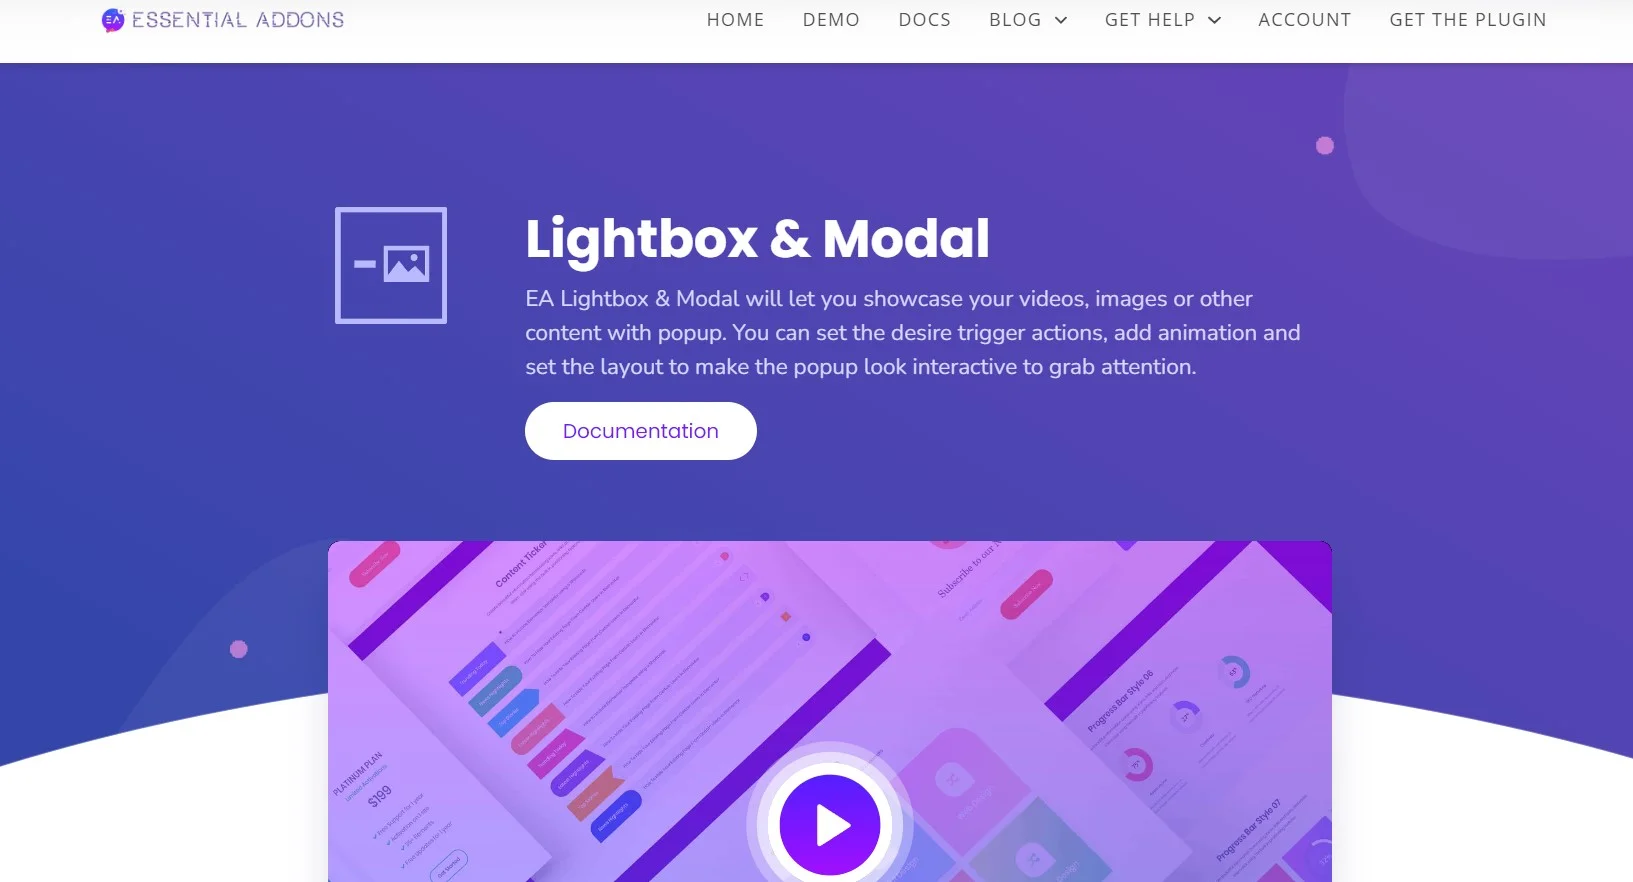
PowerPack’s Popup Box and Essential Addons’ Lightbox & Modal are widgets, not a popup builder. You place them in a page and they open on click or on load within that page’s context, with no site-wide conditions engine behind them. That is a narrower job than Popup Builder does, and for a single modal on a single landing page it is often the more sensible one. PowerPack’s plans start at $49 a year for one site. Both come inside broader Elementor add-on packs, so check what you already own before buying anything.
Alternative pricing checked 31 August 2026 against each vendor’s own pricing page.
Which route should you take
- Already on Advanced Solo, Advanced or Expert: use Popup Builder. You have paid for it and nothing else integrates as tightly with the editor.
- On Essential, or on free Elementor: install Popup Maker. Upgrading a licence purely for popups is $24 a year for a feature you can get free.
- Running three or more client sites: price Advanced at $108 for three, or Expert at $204 for 25, rather than stacking single-site licences.
- You need split testing and conversion reporting: none of the above will give you it out of the box. Start from the popup plugin roundup instead.
- You want one modal on one landing page: use a popup widget from an add-on pack. A site-wide conditions engine is overkill.
If your real problem is showing and hiding page content by rule rather than in an overlay, the dynamic visibility and condition plugins handle that job far better than any popup ever will.
Frequently Asked Questions
Can I create popups with free Elementor?
No. Popup Builder is an Elementor Pro feature, and it is not in every Pro plan. Elementor’s documentation puts it on Advanced plans and higher, and the pricing page lists it as not included on the Essential tier. Free Elementor has no Popups menu at all.
Which Elementor plan do I need for popups?
Advanced Solo is the cheapest plan that includes Popup Builder, at $84 a year for one site. Advanced covers three sites for $108 and Expert covers 25 for $204. Essential, at $60, does not list Popup Builder. Prices checked 31 August 2026.
Why is my Elementor popup not showing?
Conditions, triggers and advanced rules all have to pass at once, so any one of them can silently block the popup. Remove every rule except a single Include condition, confirm it fires in a private window, then add rules back one at a time until it stops.
How do I open a popup from a button click?
Add a Button widget, click the dynamic tags icon beside the Link field, and choose Actions then Popup. Set Action to Open Popup and select your popup. Elementor forms can do the same through Actions After Submit, and any element can trigger one via Open By Selector.
Can I limit how often a popup appears?
Yes. Show up to X times under Advanced Rules caps it, counted either On Open or On Close. The count is kept in the visitor’s browser local storage until cleared. Show after X page views and Show after X sessions delay the first appearance instead.
Do Elementor popups work with caching plugins?
Mostly, with one documented exception. Elementor warns that the Hide for logged in users advanced rule may not work properly on cached sites, because a cached page cannot tell who requested it. Handle that case with a display condition or a cache exclusion instead.
Does Elementor track popup conversions?
No. Popup Builder has no impressions counter, conversion rate or split testing. You measure it yourself, usually with GA4 events or by counting submissions from the form inside the popup. If reporting matters to you, pick a dedicated popup plugin instead.
What happens to my popups if I stop paying for Elementor Pro?
Elementor says you can no longer update Elementor Pro or add Pro features, and may have only limited access to existing Pro features. Anything from free Elementor keeps working. Popups are a Pro feature, so budget the licence as a recurring cost, not a one-off purchase.
The verdict
Elementor’s Popup Builder is the right tool if you already hold an Advanced Solo licence or better. Little else lets you build a popup with the same editor, dynamic tags and form actions you use for the rest of the site — JetPopup is the closest alternative, and the conditions engine is more precise than most dedicated popup plugins bother to be.
If you are on Essential or on free Elementor, do not upgrade for this. Install Popup Maker, spend nothing, and put the $84 towards something you cannot get free. And whichever route you take, wire up your own measurement on day one, because neither tool will tell you whether the popup earned its place.
Build one popup, scope it to a single page, cap it at once per visitor, and check the numbers in a fortnight. That beats four site-wide popups every time.



[…] your posts is covered in our guide to building a blog with Elementor Pro, opt-ins are covered in creating popups with Elementor, and anything Elementor cannot do natively is usually solved by one of the Elementor addons worth […]